

Why Bathroom Caulk Matters More Than Most Homeowners Realize
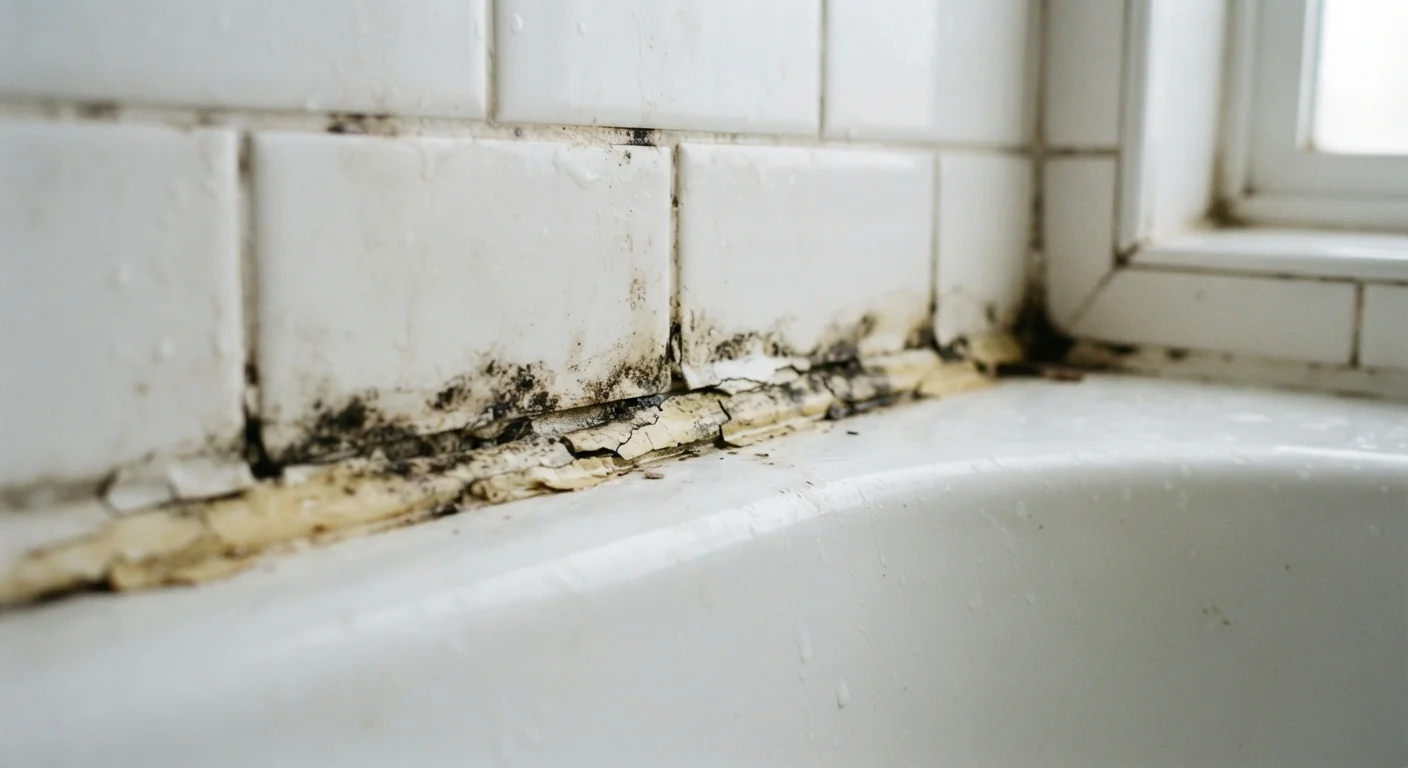
That thin bead of caulk running along your tub, shower pan, or sink basin does something deceptively important: it prevents water from migrating into the gap between fixtures and surrounding surfaces. Once it fails — cracking, peeling, or growing mold — moisture finds its way behind tile and into wall cavities, where damage accumulates silently and expensively.
Understanding why caulk fails is the first step toward preventing it. Most failures come down to a handful of predictable mistakes made during application or material selection. The good news is that re-caulking a bathroom is a manageable DIY task when done correctly. For broader plumbing maintenance context, see our guide on plumbing maintenance tasks every homeowner should know.
Applying new caulk directly over old, failed caulk without removing it first.
Why it happens: It looks faster and the new bead can briefly cover the problem, making homeowners believe the repair is complete.
Using the wrong type of caulk for wet bathroom environments.
Why it happens: Many homeowners grab whatever caulk is available, not realizing that standard paintable acrylic caulk is not formulated to withstand constant moisture and temperature swings.
Caulking over a damp or insufficiently cleaned surface.
Why it happens: Homeowners are often eager to finish the job quickly and underestimate how long surfaces need to dry after cleaning.
Exposing fresh caulk to water before it has fully cured.
Why it happens: Product packaging sometimes lists a tack-free time that is much shorter than the full cure time, and homeowners mistake one for the other.
Leaving gaps or voids in the caulk bead, particularly at corners.
Why it happens: Corners are awkward to reach, and an uneven bead can look acceptable from a distance while harboring entry points for water.
How to Re-Caulk the Right Way
Once you understand what causes caulk to fail, the repair process becomes straightforward. Follow these steps for a lasting result:
- Remove all old caulk completely. Use a plastic scraper or dedicated caulk removal tool to pull out every trace. Residue left behind will prevent new caulk from bonding to the substrate.
- Clean and dry the surface thoroughly. Wipe down with rubbing alcohol or a diluted bleach solution to kill any mold spores. Allow the surface to dry completely — ideally 24 hours — before applying new caulk.
- Select 100% silicone or a siliconized latex caulk rated for wet areas. Read product labels carefully. Look for language like "kitchen and bath," "mold-resistant," or "for wet areas." Standard paintable acrylic caulk is not appropriate for tub or shower surrounds.
- Apply in one smooth, continuous bead. Cut the applicator tip at a shallow angle and maintain steady pressure. A smaller bead is easier to tool neatly than an oversized one.
- Tool and smooth immediately. Wet your finger or a caulk tool and smooth the bead in one pass. Work quickly — silicone begins skinning over within minutes.
- Allow full cure time before exposing to water. Most silicone caulks require 24–48 hours to cure fully. Check the product label. Using the shower too soon is one of the most common reasons a fresh caulk job fails prematurely.
Don't Rush the Cure Time
Using a shower or tub within the first 24 hours of re-caulking is one of the leading causes of premature caulk failure. Water introduced before the caulk has fully cured prevents proper adhesion and can cause the entire bead to lift or peel within days. Plan the project around a period when the bathroom can stay dry.
If you notice mold or soft drywall behind the area you are recaulking, the damage may extend beyond the surface. In that case, consult a licensed contractor before sealing the area back up — trapping moisture inside a wall cavity accelerates structural decay.
When to Call a Professional
Re-caulking a tub or shower surround is genuinely DIY-friendly, but there are situations where professional help is warranted. If grout is crumbling across large sections of tile, if the tile itself is loose or shifting, or if you find soft spots in the subfloor or drywall adjacent to the fixture, you may be dealing with water damage that goes well beyond a caulking repair. A licensed tile setter or contractor can assess the extent of the damage and recommend appropriate remediation. Attempting to caulk over a structurally compromised surface delays necessary repairs and often makes them more expensive. For sealing gaps elsewhere in the home — around windows and doors — the considerations are different; our article on caulk vs. weatherstripping explains when each material is the right choice.
The content on this site is for informational purposes only and is not a substitute for professional advice. Always consult a qualified professional for guidance specific to your situation.